Now Hiring! - Field Service Engineer - HVAC/Refrigeration Tech
- Home
- Services
-
-
-
- NEW LAB EQUIPMENTLOOKING FOR THE LATEST IN NEW LABORATORY EQUIPMENT, LOOK NO FUTHER THAN BIOTECHNICAL SERVICES, INC. TO MEET ALL OF YOUR NEW LAB EQUIPMENT PURCHASE NEEDS! WITH RELIABLE BRAND NAMES LIKE LAB COMPANION, RICE LAKE, SARTORIUS, OHAUS, AND OTHERS BTS OFFERS A WIDE RANGE OF LABORATORY EQUIPMENT, FROM VARIOUS MANUFACTURERS FOR YOU TO CHOOSE FROM AND AFFORDABLE PRICING; YOU CAN’T GO WRONG. CLICK ON YOUR CHOICE BELOW. USE DISCOUNT CODE: “LABCOMP” TO RECEIVE A 20% DISCOUNT ON ALL LAB COMPANION PRODUCTS.
- BALANCESBIOTECHNICAL SERVICES, INC. OFFERS A WIDE RANGE OF BALANCES AND SCALES FROM VARIOUS MANUFACTURERS INCLUDING A&D, OHAUS, SARTORIUS, AND RICELAKE.
- A&D SeriesBIOTECHNICAL SERVICES, INC. OFFERS A WIDE RANGE OF A& D BALANCES, SCALES, AND ACCESSORIES.
- AD-4212ABIOTECHNICAL SERVICES, INC. OFFERS A WIDE RANGE OF AD4212A MODELS AND RELATED ACCESSORIES.
- Apollo GXBIOTECHNICAL SERVICES, INC. OFFERS A WIDE RANGE OF APOLLO GX MODELS AND RELATED ACCESSORIES.
- EJBIOTECHNICAL SERVICES, INC. OFFERS A WIDE RANGE OF EJ MODELS AND RELATED ACCESSORIES.
- EK-EPBIOTECHNICAL SERVICES, INC. OFFERS A WIDE RANGE OF EK-EP MODELS.
- EK-IBIOTECHNICAL SERVICES, INC. OFFERS A WIDE RANGE OF EK-I MODELS AND RELATED ACCESSORIES.
- EW-IBIOTECHNICAL SERVICES, INC. OFFERS EW-I MODELS FROM A&D.
- FX-IBIOTECHNICAL SERVICES, INC. OFFERS A WIDE RANGE OF FX-I MODELS AND RELATED ACCESSORIES.
- GEMINI GRBIOTECHNICAL SERVICES, INC. OFFERS SEVERAL GEMINI GR MODELS.
- GF-KBIOTECHNICAL SERVICES, INC. OFFERS SEVERAL GF-K MODELS.
- GF-PBIOTECHNICAL SERVICES, INC. OFFERS GF-P MODELS AND RELATED ACCESSORIES.
- GH PHOENIXBIOTECHNICAL SERVICES, INC. SEVERAL GH PHOENIX MODELS AND RELATED ACCESSORIES.
- GX-KBIOTECHNICAL SERVICES, INC. OFFERS SEVERAL GX-K MODELS AND RELATED ACCESSORIES.
- HR-A/HR-AZBIOTECHNICAL SERVICES, INC. OFFERS SEVERAL HR-A/HR-AZ MODELS AND RELATED ACCESSORIES.
- HR ORIONBIOTECHNICAL SERVICES, INC. OFFERS HR ORION MODELS.
- ION BMBIOTECHNICAL SERVICES, INC. OFFERS SEVERAL ION BM MODELS AND RELATED ACCESSORIES.
- MCBIOTECHNICAL SERVICES, INC. OFFERS MC MODELS AND RELATED ACCESSORIES.
- MS/MX/MF/MLBIOTECHNICAL SERVICES, INC. OFFERS MS/MX/MF/ML MODELS AND RELATED ACCESSORIES.
- EXPLORER PRO SERIESBIOTECHNICAL SERVICES, INC. OFFERS A WIDE RANGE OF EXPLORER PRO SERIES SCALES, BALANCES, AND RELATED ACCESSORIES.
- EXPLORER PROBIOTECHNICAL SERVICES, INC. OFFERS A RANGE OF NTEP/WITH CALIBRATION/STANDARD MODELS AND RELATED ACCESSORIES.
- NTEP MODELS, LEGAL-FOR-TRADEBIOTECHNICAL SERVICES, INC. OFFERS A RANGE OF NTEP MODELS STANDARD AND WITH INTERNAL CALIBRATION.
- STANDARD MODELSBIOTECHNICAL SERVICES, INC. OFFERS CS/L/EX/HH/NAVIG/VALOR STANDARD MODELS AND RELATED ACCESSORIES.
- WITH INTERNAL CALIBRATIONBIOTECHNICAL SERVICES, INC. OFFERS ANALYTICAL BALANCES MODELS WITH INTERNAL CALIBRATION AND RELATED ACCESSORIES.
- EXPLORER PROBIOTECHNICAL SERVICES, INC. OFFERS A RANGE OF NTEP/WITH CALIBRATION/STANDARD MODELS AND RELATED ACCESSORIES.
- RICE LAKEBIOTECHNICAL SERVICES, INC. OFFERS A WIDE RANGE OF BALANCES, SCALES, AND RELATED ACCESSORIES FROM RICELAKE.
- EQUIPOISEBIOTECHNICAL SERVICES, INC. OFFERS SEVERAL EQUIPOSE MODELS AND RELATED ACCESSORIES.
- TABIOTECHNICAL SERVICES, INC. OFFERS TA MODELS AND RELATED ACCESSORIES FROM RICE LAKE.
- TCBIOTECHNICAL SERVICES, INC. OFFERS TC MODELS AND RELATED ACCESSORIES FROM RICE LAKE.
- TEBIOTECHNICAL SERVICES, INC. OFFERS TE MODELS AND RELATED ACCESSORIES FROM RICE LAKE.
- TPBIOTECHNICAL SERVICES, INC. OFFERS TP MODELS AND RELATED ACCESSORIES FROM RICE LAKE.
- TSBIOTECHNICAL SERVICES, INC. OFFERS TS MODELS AND RELATED ACCESSORIES FROM RICE LAKE.
- SARTORIUS PRODUCTSBIOTECHNICAL SERVICES, INC. OFFERS A WIDE RANGE OF BALANCES, SCALES, AND ACCESSORIES FROM SARTORIUS.
- ACCESSORIESBIOTECHNICAL SERVICES, INC. OFFERS ACCESSORIES FROM SARTORIUS.
- CUBIS B&W/HD/LCD DISPLAYBIOTECHNICAL SERVICES, INC. OFFERS A WIDE RANGE OF CUBIS/B&W/HD/LCD DISPLAY BALANCES, SCALES, AND RELATED ACCESSORIES FROM SARTORIUS.
- ENTRISBIOTECHNICAL SERVICES, INC. OFFERS A WIDE RANGE OF ENTRIS BALANCES AND SCALES FROM SARTORIUS.
- MOISTURE ANALYZERBIOTECHNICAL SERVICES, INC. OFFERS MOISTURE ANALYZERS FROM SARTORIUS.
- PRACTUMBIOTECHNICAL SERVICES, INC. OFFERS SEVERAL PRACTUM MODELS FROM SARTORIUS.
- QUINTIXBIOTECHNICAL SERVICES, INC. OFFERS SEVERAL QUINTIX MODELS FROM SARTORIUS.
- SECURABIOTECHNICAL SERVICES, INC. OFFERS SEVERAL SECURA MODELS FROM SARTORIUS.
- A&D SeriesBIOTECHNICAL SERVICES, INC. OFFERS A WIDE RANGE OF A& D BALANCES, SCALES, AND ACCESSORIES.
- BATHS AND COOLERSBIOTECHNICAL SERVICES, INC. OFFERS A WIDE RANGE OF CIRCULATORS AND COOLERS FROM LAB COMPANION. USE DISCOUNT CODE: “LABCOMP” TO RECEIVE A 20% DISCOUNT ON ALL LAB COMPANION PRODUCTS.
- BATHS-CIRCULATORSBIOTECHNICAL SERVICES, INC. OFFERS A WIDE RANGE OF BATH-CIRCULATORS AND RELATED ACCESSORIES FROM LAB COMPANION. USE DISCOUNT CODE: “LABCOMP” TO RECEIVE A 20% DISCOUNT ON ALL LAB COMPANION PRODUCTS.
- RECIRCULATING COOLERSBIOTECHNICAL SERVICES, INC. OFFERS A WIDE RANGE OF RECIRCULATING COOLERS FROM LAB COMPANION. USE DISCOUNT CODE: “LABCOMP” TO RECEIVE A 20% DISCOUNT ON ALL LAB COMPANION PRODUCTS.
- BLOCKSBIOTECHNICAL SERVICES, INC. OFFERS A WIDE RANGE OF HEATING BLOCKS, COOLING BLOCKS, AND RELATED ACCESSORIES FROM LAB COMPANION. USE DISCOUNT CODE: “LABCOMP” TO RECEIVE A 20% DISCOUNT ON ALL LAB COMPANION PRODUCTS.
- CENTRIFUGE ACCESSORIESBIOTECHNICAL SERVICES, INC. OFFERS A WIDE RANGE OF CENTRIFUGE ACCESSORIES FOR BRANDS INCLUDING BECKMAN, SORVAL, AND EPPENDORF.
- CHAMBERSBIOTECHNICAL SERVICES, INC. OFFERS A WIDE RANGE OF TEMPERATURE CHAMBERS, HUMIDITY CHAMBERS, AND RELATED ACCESSORIES FROM LAB COMPANION. USE DISCOUNT CODE: “LABCOMP” TO RECEIVE A 20% DISCOUNT ON ALL LAB COMPANION PRODUCTS.
- ELECTROPHORESISBIOTECHNICAL SERVICES, INC. OFFERS ELECTROPHORESIS SYSTEMS AND RELATED ACCESSORIES FROM LAB COMPANION. USE DISCOUNT CODE: “LABCOMP” TO RECEIVE A 20% DISCOUNT ON ALL LAB COMPANION PRODUCTS.
- HOODS & CLEAN BENCHESBIOTECHNICAL SERVICES, INC. OFFERS A WIDE RANGE OF FUME HOODS, CLEAN BENCHES, AND RELATED ACCESSORIES FROM LAB COMPANION. USE DISCOUNT CODE: “LABCOMP” TO RECEIVE A 20% DISCOUNT ON ALL LAB COMPANION PRODUCTS.
- HOTPLATES & STIRRERSBIOTECHNICAL SERVICES, INC. OFFERS A WIDE RANGE OF HOT PLATES, STIRRERS, AND RELATED ACCESSORIES FROM LAB COMPANION. USE DISCOUNT CODE: “LABCOMP” TO RECEIVE A 20% DISCOUNT ON ALL LAB COMPANION PRODUCTS.
- INCUBATORSBIOTECHNICAL SERVICES, INC. OFFERS A WIDE RANGE OF INCUBATORS AND RELATED ACCESSORIES FROM LAB COMPANION. USE DISCOUNT CODE: “LABCOMP” TO RECEIVE A 20% DISCOUNT ON ALL LAB COMPANION PRODUCTS.
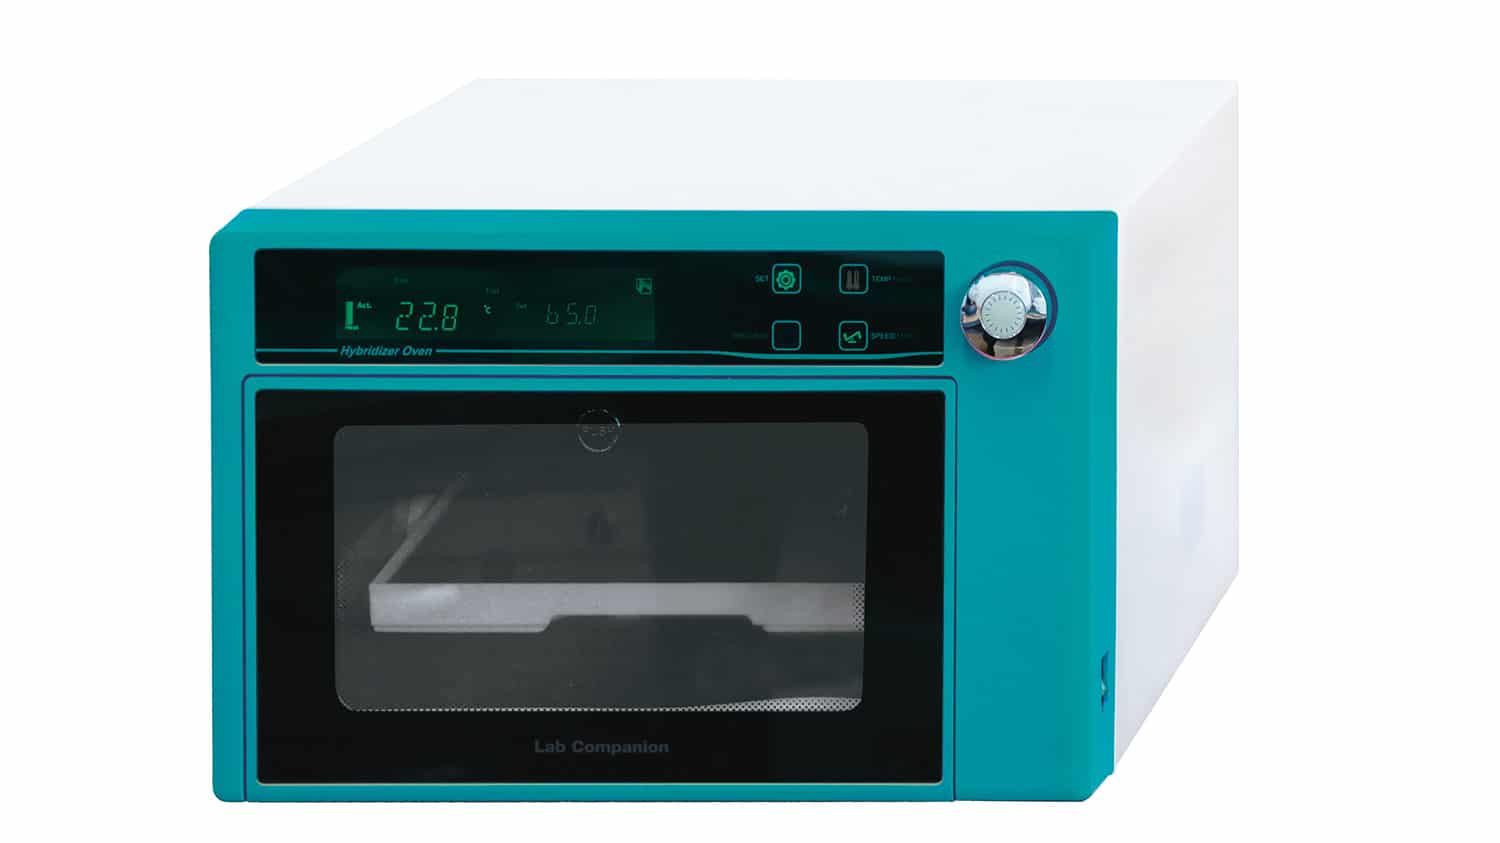
- OVENSBIOTECHNICAL SERVICES, INC.OFFERS A WIDE RANGE OF LABORATORY OVENS AND RELATED ACCESSORIES FROM LAB COMPANION. USE DISCOUNT CODE: “LABCOMP” TO RECEIVE A 20% DISCOUNT ON ALL LAB COMPANION PRODUCTS.
- PUMPS AND ACCESSORIESBIOTECHNICAL SERVICES, INC. OFFERS VACUUM PUMPS AND RELATED ACCESSORIES FROM LAB COMPANION. USE DISCOUNT CODE: “LABCOMP” TO RECEIVE A 20% DISCOUNT ON ALL LAB COMPANION PRODUCTS.
- REFRIGERATORS AND FREEZERSBIOTECHNICAL SERVICES, INC. OFFERS A WIDE RANGE OF REFRIGERATORS, FREEZERS, AND RELATED ACCESSORIES FROM LAB COMPANION. USE DISCOUNT CODE: “LABCOMP” TO RECEIVE A 20% DISCOUNT ON ALL LAB COMPANION PRODUCTS.
- ROTATORSBIOTECHNICAL SERVICES, INC. OFFERS LABORATORY ROTATORS FROM LAB COMPANION. USE DISCOUNT CODE: “LABCOMP” TO RECEIVE A 20% DISCOUNT ON ALL LAB COMPANION PRODUCTS.
- SHAKERSBIOTECHNICAL SERVICES, INC. OFFERS A WIDE RANGE OF LABORATORY SHAKERS AND RELATED ACCESSORIES FROM LAB COMPANION. USE DISCOUNT CODE: “LABCOMP” TO RECEIVE A 20% DISCOUNT ON ALL LAB COMPANION PRODUCTS.
- ULTRASONIC CLEANERSBIOTECHNICALE SERVICES, INC. OFFERS A WIDE RANGE OF ULTRASONIC CLEANERS AND RELATED ACCESSORIES FROM LAB COMPANION. USE DISCOUNT CODE: “LABCOMP” TO RECEIVE A 20% DISCOUNT ON ALL LAB COMPANION PRODUCTS.
- VORTEX MIXERSBIOTECHNICAL SERVICES, INC. OFFERS A WIDE RANGE OF VORTEX MIXERS AND RELATED ACCESSORIES FROM LAB COMPANION. USE DISCOUNT CODE: “LABCOMP” TO RECEIVE A 20% DISCOUNT ON ALL LAB COMPANION PRODUCTS.
- BALANCESBIOTECHNICAL SERVICES, INC. OFFERS A WIDE RANGE OF BALANCES AND SCALES FROM VARIOUS MANUFACTURERS INCLUDING A&D, OHAUS, SARTORIUS, AND RICELAKE.
- NEW LAB EQUIPMENTLOOKING FOR THE LATEST IN NEW LABORATORY EQUIPMENT, LOOK NO FUTHER THAN BIOTECHNICAL SERVICES, INC. TO MEET ALL OF YOUR NEW LAB EQUIPMENT PURCHASE NEEDS! WITH RELIABLE BRAND NAMES LIKE LAB COMPANION, RICE LAKE, SARTORIUS, OHAUS, AND OTHERS BTS OFFERS A WIDE RANGE OF LABORATORY EQUIPMENT, FROM VARIOUS MANUFACTURERS FOR YOU TO CHOOSE FROM AND AFFORDABLE PRICING; YOU CAN’T GO WRONG. CLICK ON YOUR CHOICE BELOW. USE DISCOUNT CODE: “LABCOMP” TO RECEIVE A 20% DISCOUNT ON ALL LAB COMPANION PRODUCTS.
-
-
-
- PARTS AND CONSUMABLESBIOTECHNICAL SERVICES, INC. OFFERS CENTRIFUGE PARTS AND MISCELLANEOUS ITEMS FROM VARIOUS MANUFACTURERS.
- Used Lab Equipment in San DiegoAT BIOTECHNICAL SERVICES, INC. LOCATED IN SAN DIEGO, CA WE SELL QUALITY USED LAB EQUIPMENT AT REASONABLE PRICES. BELOW FIND AN ARRAY OF USED LAB EQUIPMENT AVAILABLE FOR PURCHASE AT THIS TIME.
-
-
- Contact
- Blog
- Customer Reviews
- Customer Portal
Procedure for Cleaning, Operation, and Calibration of Incubator
If you want to develop and provide optimum storage for your cell cultures properly, you must maintain the highest performance standards for your lab incubator. Decontamination, cleaning, proper usage, and calibration of an incubator keep it running efficiently. An efficient incubator maintains the required gaseous, humidity, and temperature levels. No matter the types of incubator, such as Biological Oxygen Demand (BOD), dual or single block, they have almost standard cleaning, operation, and calibration methods.
If your equipment is not working as it should or its calibration certificate has expired, contact us at Biotechnical Services Inc. for testing, maintenance, and incubator calibration in Los Angeles. We provide precise and accurate calibration of all types of lab incubators.
The procedure of Cleaning Your Incubator
Transfer Your Cell Culture to Another Incubator
Before cleaning your incubator, transfer your specimen to the next incubator to avoid contamination or getting your culture compromised during the process. When your incubator is empty, you can work on it with comfort and perform confident and thorough cleaning. The next step is to shut down your incubator and cut the gas supply off.
Remove The Shelves and Internal Components
For proper cleaning of your incubator, take out all the removable components. Empty your water dish and wipe it with a clean cloth to avoid shedding fibers and lint.
Clean The Internal Surfaces
Using a mild dish detergent or a botanical cleaner, clean all your incubator’s internal parts, including the shelves, ducts, shelf supports, door gaskets, and fan. Ensure that you remove all the residues, dirt, and dust. Rinse the interior surface and wipe using a dry cloth. When you have entirely wiped every component, disinfect the interior chamber with 70% alcohol to keep your incubator clean and eliminate any lingering disinfectant.
Turn The Incubator Heat On
Close the incubator door and turn the heat on. Closing the door ensures that the incubator does not attract dust and other contaminants again during the process. The heating process should take a few minutes only.
Turn On Automatic Decontamination
The decontamination cycle is meant to get rid of any fungi or bacteria. Once the process is complete, fill the sterile water into the water reservoir. Avoid using tap water because the tiny amount of chlorine can corrode the cooper or steel parts with time and introduce more minerals and bacteria. Ultra-pure or deionized water is not recommended because it is aggressive; ions may react with copper, steel, glass, and other components in your incubator.
Clean Incubator’s Exterior
Clean every exterior part of your incubator to prevent dust, dirt, and other contaminants from getting into your incubator when you open the door. When cleaning the exterior part of the incubator, use a lint-free cloth with soapy water. Wipe with a soft clean cloth and clear water before drying it with a dry cloth. Ensure that you thoroughly clean the door handles and places you mostly touch.
Operation of Lab Incubator
Before operating your incubator, ensure that it is clean and has no residue from the previous specimen. When you have ascertained that your incubator is clean, connect its plug to the power source. Press ON both on the main switch and the control panel. You should be able to see the temperature controller, incubator motor, internal displays, and the orange lamp turning on.
On the control panel, press ON on the heating switch; you will notice a green indicator lamp and dry heater. Scroll to your desired temperature on the temperature controller by pressing the decrement or the increment key. Once you have attained your required temperature, set the thermostat at about 5 degrees above the required temperature. The thermostat will cut the power off if the temperature exceeds the allowed 5 degrees before sounding an alarm. When your temperature is set, you will see a green digital on it and a red digital display of the actual temperature.
On your PC or printer, set the time interval for data communication. If necessary, switch on the fluorescent light and enter the temperature monitoring record before recording the incubator log details of your cell culture samples. Ensure that your incubator is kept away from a heating device.
Keep a record of temperature two times a day, i.e., early in the morning and later in the evening.
At Biotechnical Services Inc., you can trust us for your equipment supply, installation, testing, and incubator calibration in Los Angeles.
Lab Incubator Calibration
Switch off your incubator and transfer your specimen to another incubator. Insert the thermal probes before removing the incubator cork from the validation porthole. After setting the temperature probes, switch on your incubator. Once your desired temperature is reached, start the data logger. Record the display temperatures and the data logger temperatures after about 10 or 15 minutes. You can monitor the sets of each temperature for about 2 to 3 hours. If you notice a temperature variation, adjust your incubator accordingly.
Conclusion
Proper cleaning, operation, and calibration of a lab incubator ensure that it runs smoothly and lasts longer. Always ensure that you frequently clean your incubator thoroughly for optimum growth of your cell cultures. Follow the standard operating procedures to ensure that your incubator is appropriately maintained. When your incubator has an error in temperature reading, contact us at Biotechnical Services Inc. for your incubator calibration in Los Angeles.

biotechservdev
Latest Posts
How To Choose the Right Laboratory Equipment Repair Service?
April 22, 2023
BTS Joins Flagship Lab Services
April 20, 2023
Weights for Calibrating Balances: Why Is This Necessary?
April 17, 2023
IQ, OQ, and PQ Validation: What You Need to Know
March 7, 2023
The Importance of Lab Equipment Validation
February 25, 2023
Calibrate Your Pressure Gauges in San Diego: 8 Things to Consider!
February 17, 2023
Social Media
Get The Latest Updates
Sign Up For Our Newsletter
No spam, notifications only about new products, updates.